
Master Your Screen: 8 Ways to Take Screenshots on Windows 10 & 11 in 2024،
A screenshot is an image taken of the content on the screen. It can be part of the screen or the entire screen. Screenshots can be handy in various situations. If you want to send a photo of a strange message to your IT manager, capture tweets before they're deleted, or save a clothing style you want to have sewn, screenshots are a good option. There are several methods available if you want to capture a screenshot of something on Windows 10 or Windows 11 devices. There are also tools to improve the quality of the screenshot.
In this article, we have listed 8 easy methods that can be used to capture and save screenshots on Windows 10 and Windows 11 computers.
8 Methods to Capture Screenshots in Windows 10 and Windows 11 in 2024
Method 1: Simultaneously press Windows + Print Screen keys
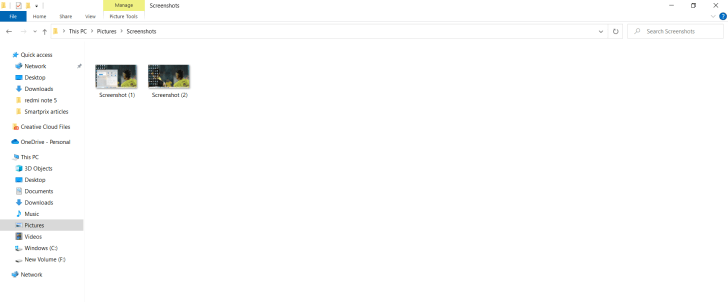
If you want to capture your entire screen and automatically save the screenshot, press/press Windows key + Print Screen keys at the same time. As soon as you press the combination, the screen will darken to indicate taking a screenshot and the screenshot will be saved to the Pictures > Screenshots folder of your device.
Method 2 – Using Print Screen Key (Prt Sc)
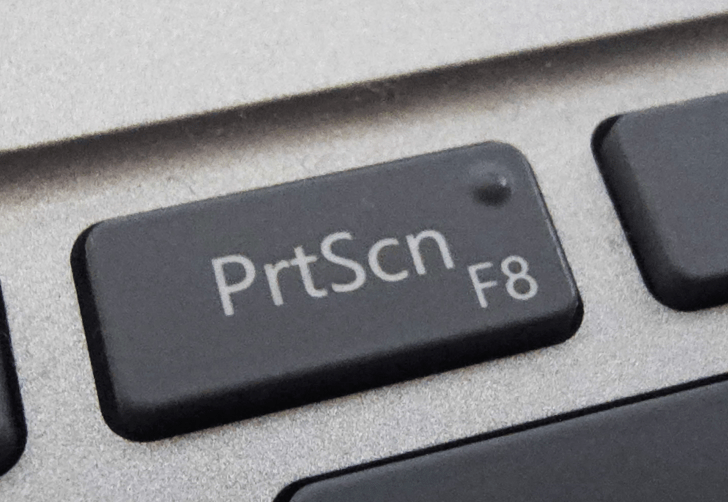
To capture your entire screen, press the Print Screen (Prt Sc) key on your device. This will copy your screenshot to your clipboard but not save it as a file. To save it, you will need to open an image editing tool (Microsoft Paint), paste the screenshot into the editor and save the file from there.
To configure the Print Screen button to open the Snipping & Sketch tool, you need to go to Settings > Ease of Access > Keyboard and toggle Use PrtSc button to open the screenshot under the Print Screen shortcut.
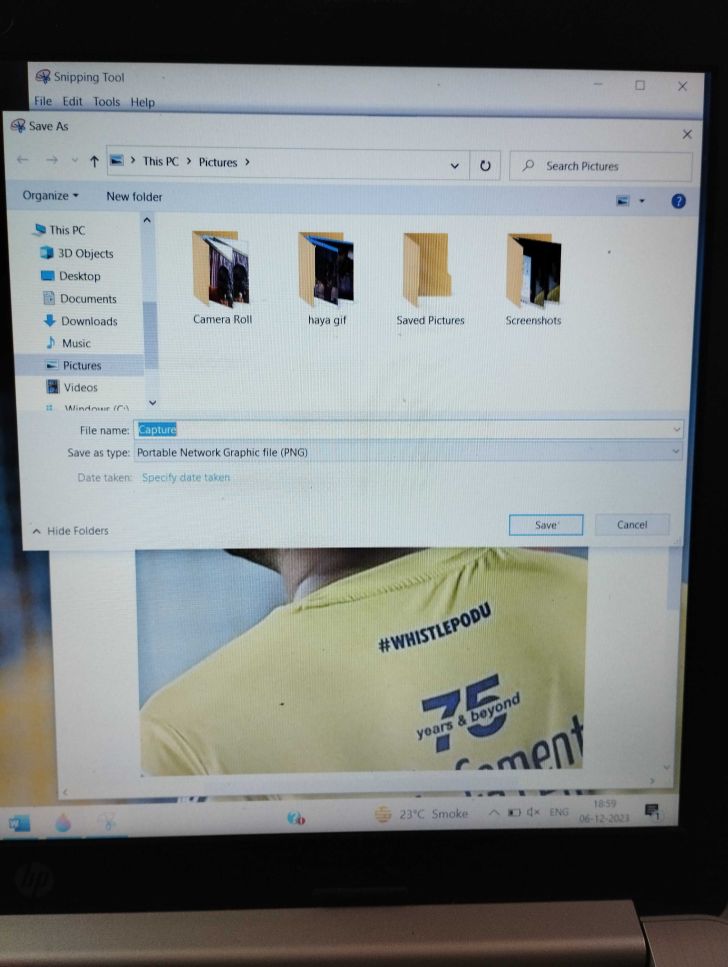
Method 3 – Snipping Tool
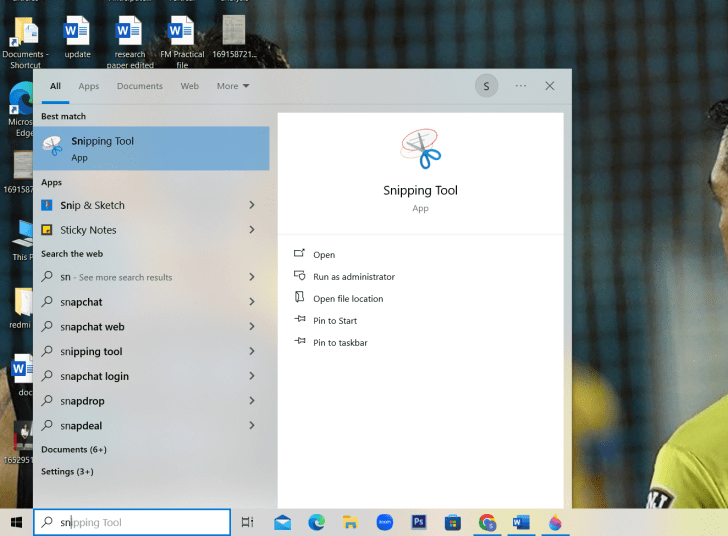
The Snipping tool is a powerful feature of most Windows computers and can be used to create images of the device's screen. The tool has been around since Windows Vista and although Windows keeps saying the tool is going away, it is still alive and kicking in Windows 11. The tool has been removed from the apps list in the Start menu, but you can always easily access it via the search bar.
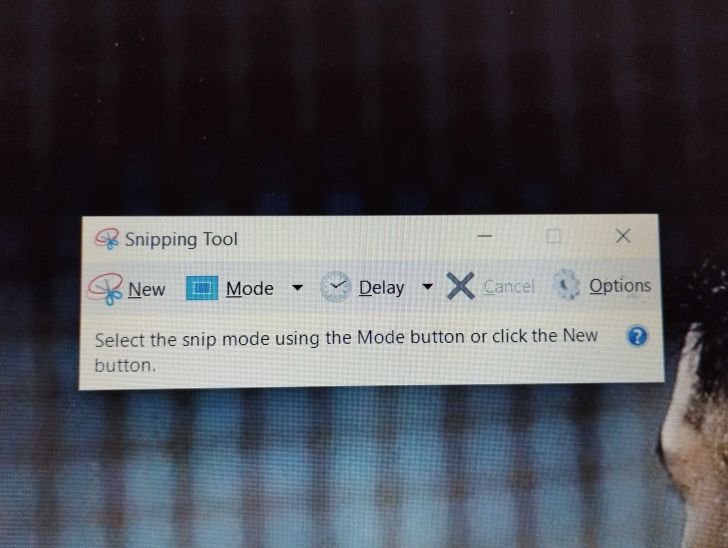
Search for Snip Tool, then click the “New” button to start the screenshot process. The default capture type is rectangular, but you can also opt for freeform, full-screen, and Windows captures. After you create your screenshot, it won't be automatically saved, so you'll need to manually save it in the tool before exiting it.
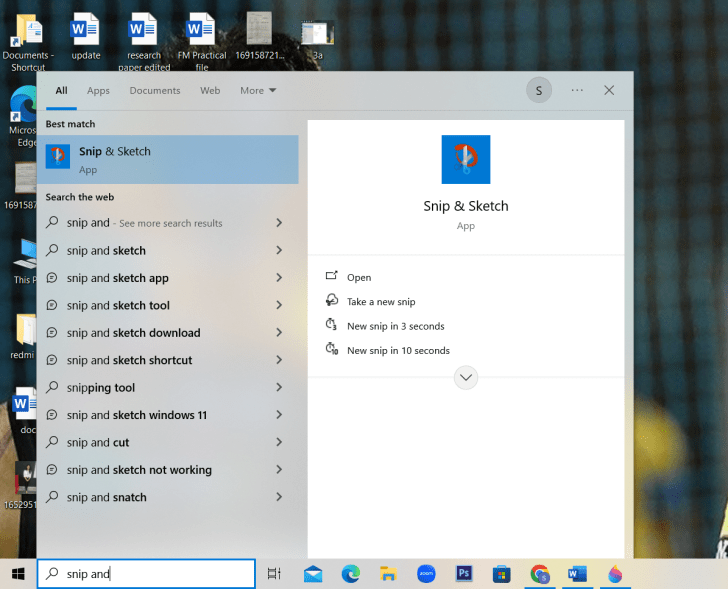
Method 4 – Capture and Sketch
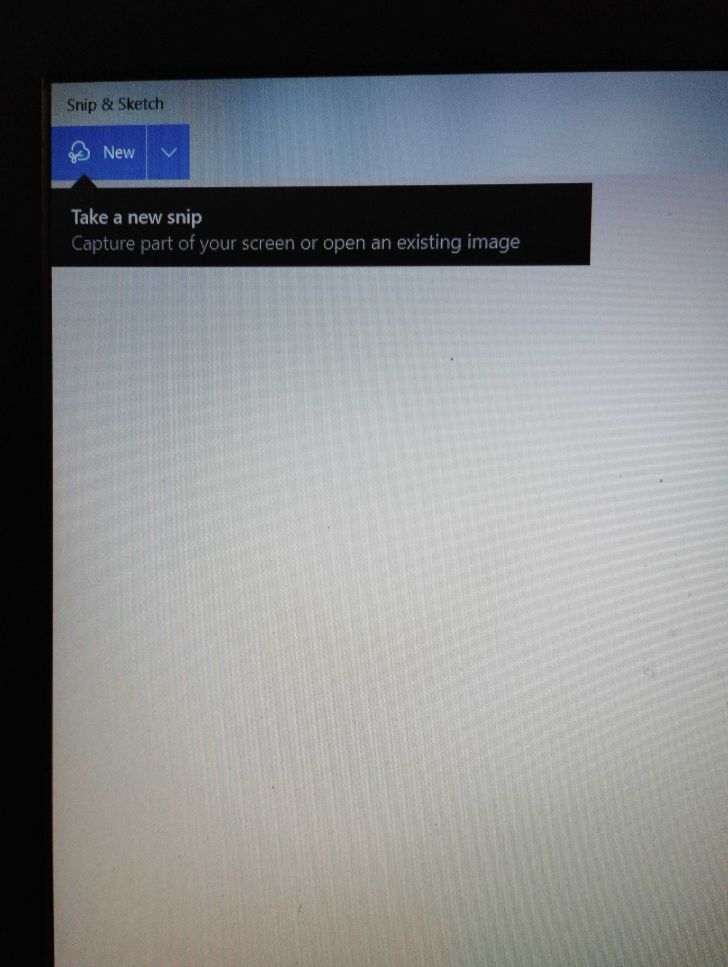
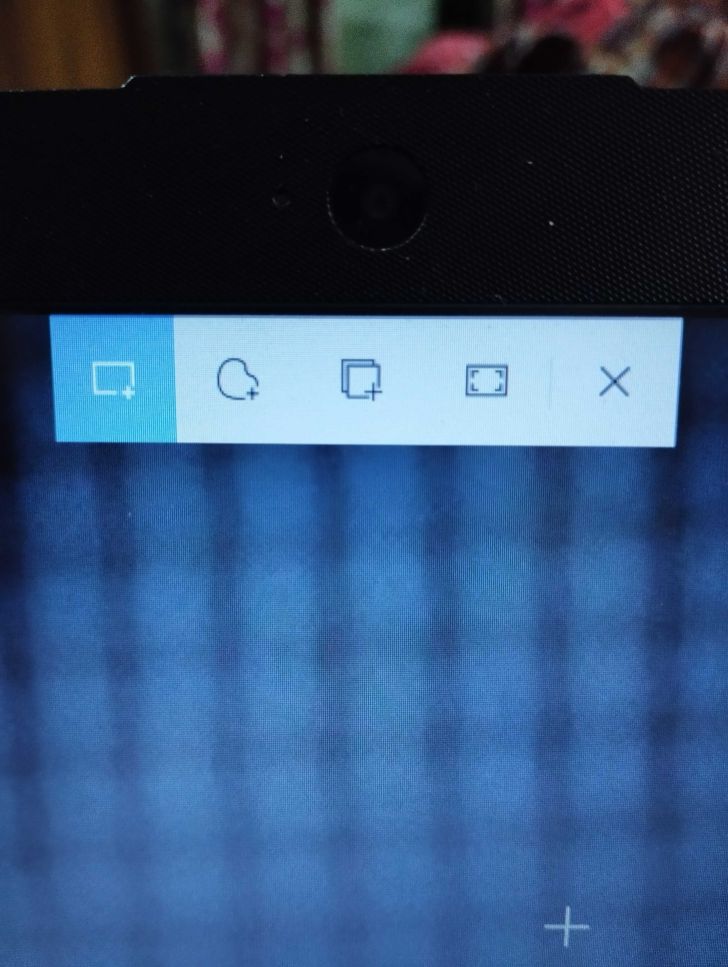
Just like Snip Tool, Snip & Sketch is also a tool that makes it easy to access, share and create screenshots. This tool can now capture a screenshot of a window on your desktop, which was not allowed before. You can access it using the search bar or with the keyboard shortcut Windows key + Shift + S. The tool can also be found in the notification panel where it is listed as Screenshot.
When you use this tool, your screen will be grayed out and a small menu will appear at the top of your screen that allows you to choose the type of screenshot you want: rectangular, freeform, fullscreen, or windowed. After taking the screenshot, it will be saved to your clipboard and will appear for a moment as a notification in the lower right corner of your screen. Tap or click the notification to open the screenshot in the Snip and Sketch app for annotating, saving, or sharing.

ALSO READ: How to Know Your Music Listening Personality with Spotify Wrapped 2023
Method 5 – Alt + Print Screen
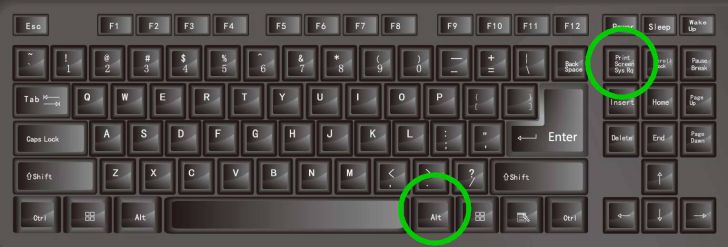
To take a quick screenshot of the active window, use the keyboard shortcut Alt+PrtScn. Your screenshot of the active window will be taken and you can then copy it to the clipboard. You will need an image editor to copy the screenshot there, and then you can save it wherever you want.
Method 6 – Keyboard shortcut
If your device does not have a Print Screen key, a keyboard shortcut can be used. Press Fn key + Windows logo + Spacebar to take a screenshot. The screenshot will be saved in the Images > Screenshots folder.
Method 7 – Windows Logo + Volume Down Key
If you're using a Microsoft Surface device, you can use physical buttons to take a screenshot. Hold down the Windows logo touch button at the bottom of your Surface's screen and press the physical volume down button on the side of the tablet. The screen will darken for a few seconds and the screenshot will be saved to the Pictures > Screenshots folder.
Method 8 – Game Bar
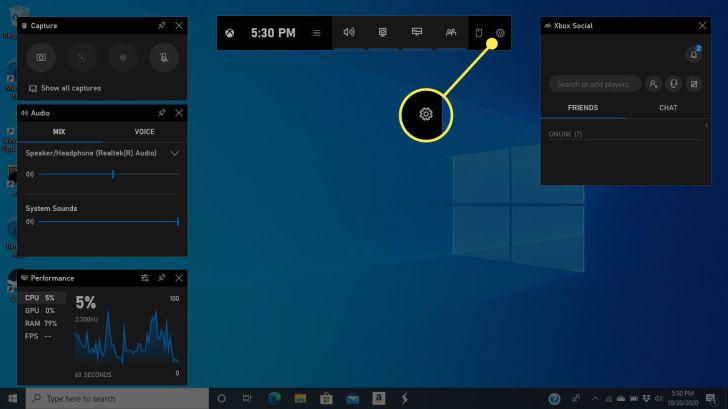
The Game Bar can be used to take a screenshot whether you are playing a game or not. For Game Bar to take a screenshot, you will need to enable it in the settings menu by enabling the option Record game clips, screenshots, and streams using Game Bar. game. Press Windows key + G key to call up the game bar. Click the screenshot button in the game bar to use the default keyboard shortcut Windows + Alt + PrtScn to capture a screenshot. screen in full screen. If you want to set the keyboard shortcut for your screenshot in the Game Bar, go to Settings > Games > Game Bar.
You can follow Smartprix on Twitter, Facebook, Instagram and Google News. Visit smartprix.com for the latest news, reviews and technical guides.